This page is not intended to cover the whole process of
building this kit but to highlight some of the construction features along
the way.
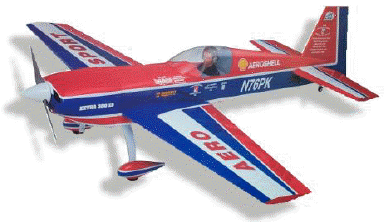
I have decided to power this 80" Extra 300 with a Moki 2.10. Radio
will be a Futaba 8 channel. I decided to build this airplane instead of
the Hostetler Edge 540 at this time. The Edge 540 will come next.
Midwest has done a great job of engineering this kit along with high
quality materials and great customer service. When the box arrived from
Chief Aircraft via. UPS in perfect condition with a dented canopy I
emailed Midwest and stated that I had the kit without any box damage but
the contents must have shifted and dented the canopy. I mentioned that I
was willing to purchase another canopy but they said one was on its way
free of charge. A few days later it was on my doorstep. Thank you Midwest!
The new Extra 300 kit comes with a laser cut horizontal stab ribs along
with laser cut parts for the vertical stab and rudder. This new stab in my
opinion is stronger and looks better on this model. I am in the process of
making a carbon fiber landing gear for this model and will construct a
plug and mold for the cowling and wheel pants which will be featured
on this web page.


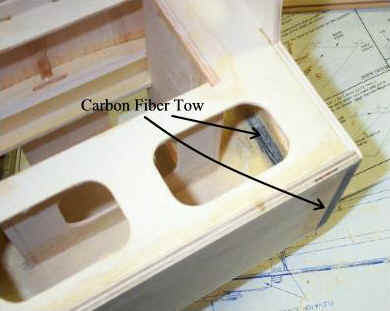 Carbon
fiber tow was used to strengthen the attachment of the landing gear plate
to the fuselage. The landing gear plate was recessed on the ends
approximately 1/16" to allow the carbon fiber tow to set flush with
the bottom of the plate. The carbon tow extends vertical up the two
formers and wraps around the bottom of the plate thereby locking the plate
into the formers. Glass cloth was also used to reinforce the corner joints
of the engine box and front formers. This method of tying parts together
is much stronger than using balsa gussets. A good resin such as West
System should be used to wet and attach the tow in this application.
Carbon
fiber tow was used to strengthen the attachment of the landing gear plate
to the fuselage. The landing gear plate was recessed on the ends
approximately 1/16" to allow the carbon fiber tow to set flush with
the bottom of the plate. The carbon tow extends vertical up the two
formers and wraps around the bottom of the plate thereby locking the plate
into the formers. Glass cloth was also used to reinforce the corner joints
of the engine box and front formers. This method of tying parts together
is much stronger than using balsa gussets. A good resin such as West
System should be used to wet and attach the tow in this application. The
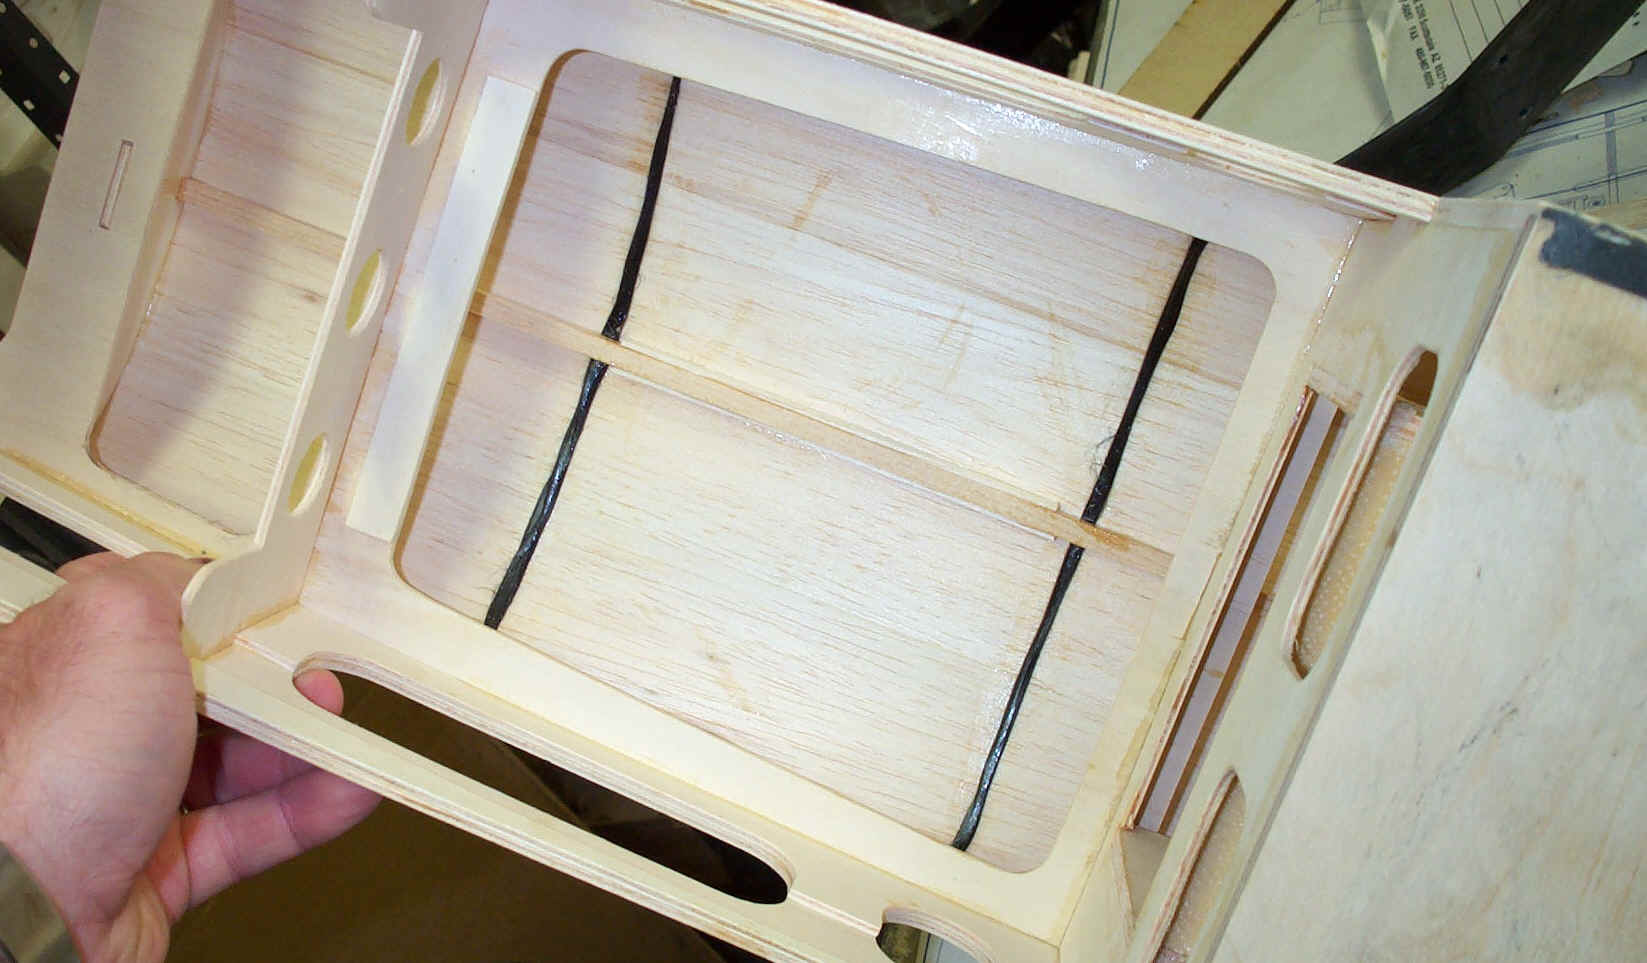
fuselage has been lightened by enlarging the cutout openings and adding
balsa in place of the 1/32" plywood front deck and turtledeck. The
balsa will not be as durable as the plywood but I feel it will make a
better flying airplane by keeping the weight down. The underside of the
balsa turtledeck will have carbon fiber stringers and formers added for
rigidity like the front hatch above.
The
fuselage has been lightened by enlarging the cutout openings and adding
balsa in place of the 1/32" plywood front deck and turtledeck. The
balsa will not be as durable as the plywood but I feel it will make a
better flying airplane by keeping the weight down. The underside of the
balsa turtledeck will have carbon fiber stringers and formers added for
rigidity like the front hatch above.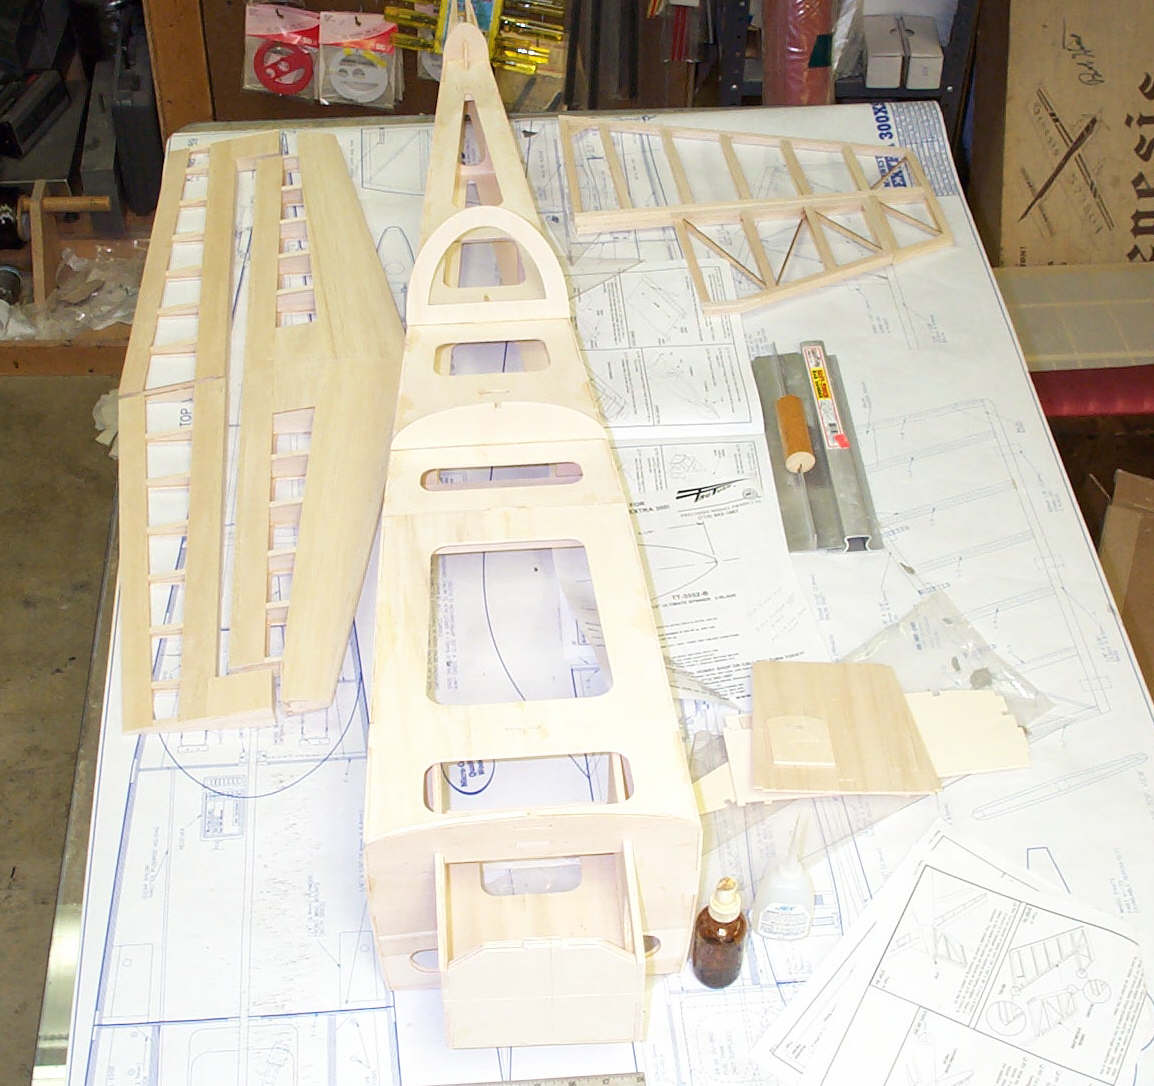
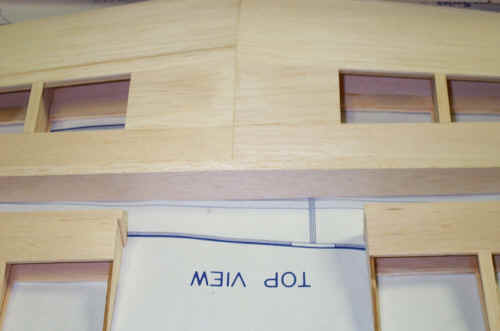 One
modification I made was in the stabilizer trailing edge. The instruction
book and the plans call for the horizontal stab trailing edge to be glued
onto the stab halves before joining thereby giving a trailing edge with a
butt seam. I decided to join the stab halves over a one piece trailing edge
for increased strength without any additional weight gain. The elevator
halves in the picture still need to be trimmed at the root for rudder clearance.
One
modification I made was in the stabilizer trailing edge. The instruction
book and the plans call for the horizontal stab trailing edge to be glued
onto the stab halves before joining thereby giving a trailing edge with a
butt seam. I decided to join the stab halves over a one piece trailing edge
for increased strength without any additional weight gain. The elevator
halves in the picture still need to be trimmed at the root for rudder clearance.